On February 10th, 2020 we released a brand new feature, Testing Areas, which is now an integral part of the workflow when you train a detector. Its purpose is to visually assess the results while you’re still building the detector. Basically, now you need to follow 3 steps in training mode:
- Defining training areas
- Drawing object outlines withing the defined training areas
- Defining testing areas
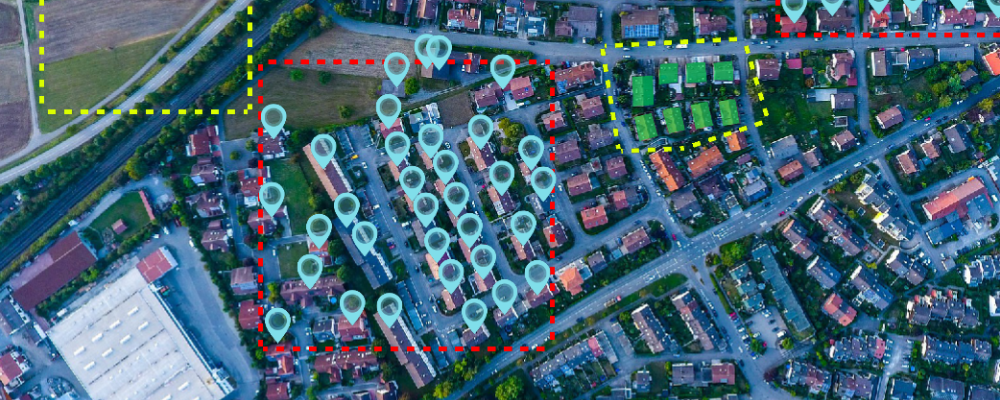
This is what they look like:
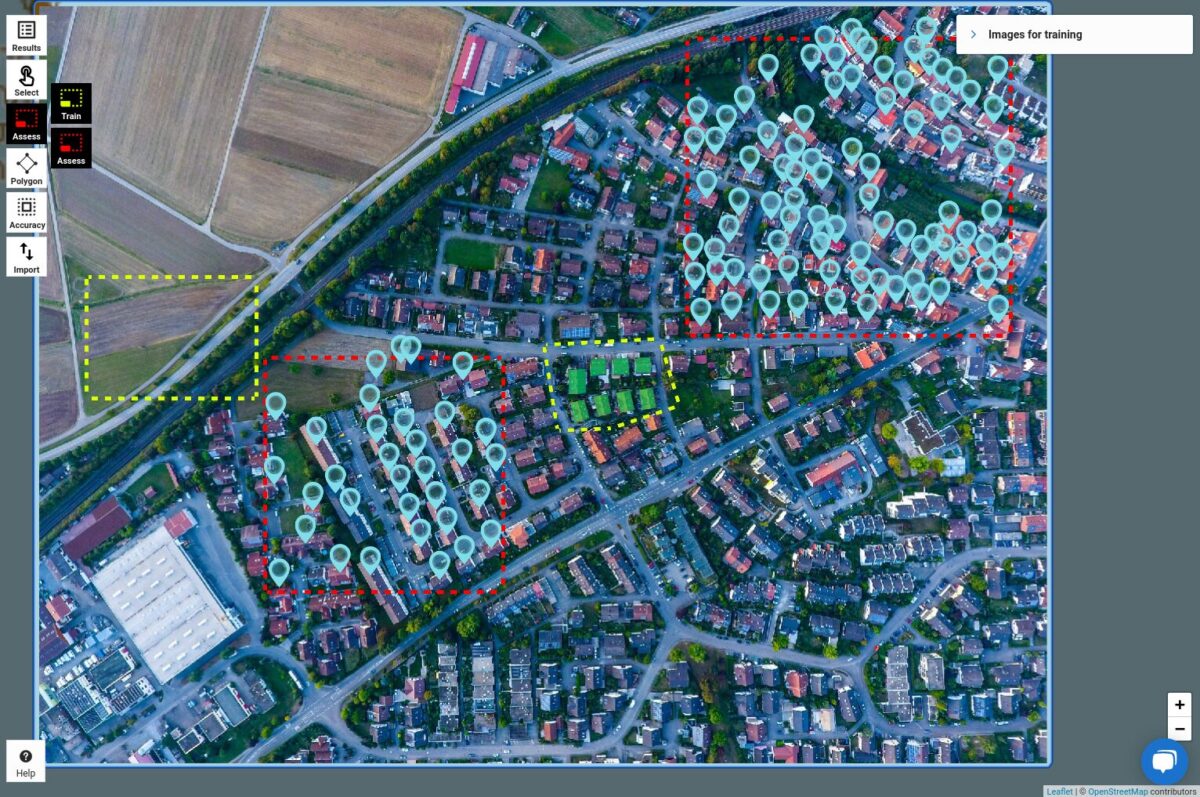
Training and Testing Areas
Training areas are yellow, testing areas – red.
Why we made testing areas a core part of building the detector?
In short, they make it possible to quickly grasp where you need to improve your detector across possibly very visually different images. Previously, it was only possible to assess your training results on one image at a time. Now, Testing Areas make it possible to control exactly where your model preview outputs during training. They also significantly speed up the training iterations, as previously, especially on big images, generating detection across the entire image used to take some time. Now, you can focus exactly on the parts of the image that are representative of the whole set and allows you to assess visually your detector performances.
Our Computer Vision Engineer, Roger Fong, explained how they work in detail in the article on Medium, so check it out. And if you haven’t read our crash intro into AI-powered object detection, it’s time to do it now.
