Let’s see how we can take advantage of this feature in the platform. The workflow roughly looks like the following:
- Create your detector
- Add classes in the new “Classes” panel for however many objects you’d like the detector to detect (you can name and color them). You can always add or remove classes while you’re annotating as necessary
- Create your areas (training, testing, accuracy, etc) as usual
- When annotating you can select which class you want to draw an annotation for from the classes panel, the annotation will be the color of that class.
- All instances of all classes in all training/accuracy areas must be annotated, as was the case for the single class detector before.
- Train your detector as usual
- Detecting on your project images works roughly the same as before. Just run your detector on your imagery in your projects, except this time it will output a separate result for each class in your detector.
Here is a visual example of annotating on different pavement types:
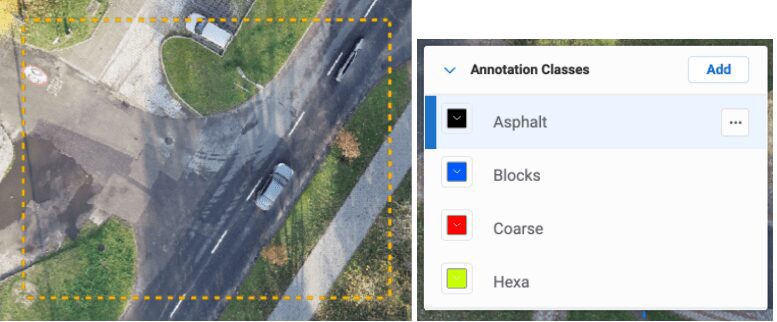
On the left, some imagery with multiple pavement types which we will annotate as different classes. On the right, we have the classes panel in the UI with several classes here to annotate, (which I simply named according to their visual appearance 😀 )
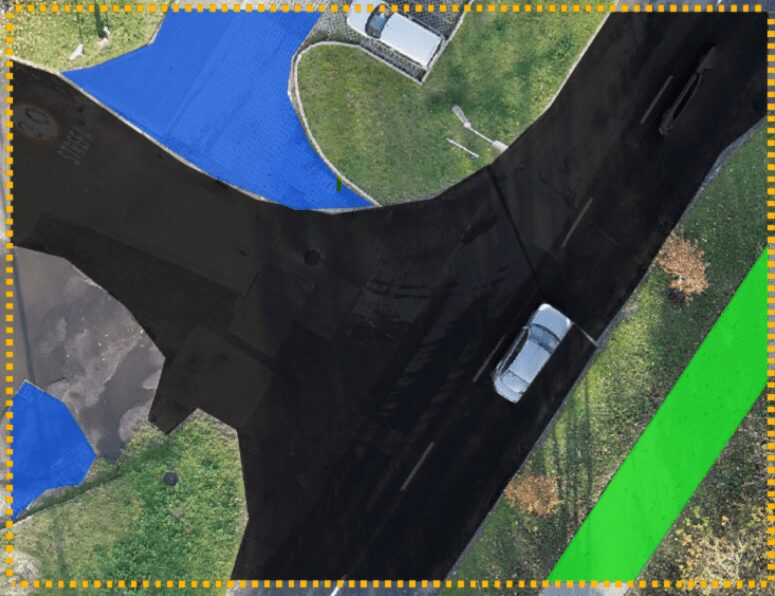
The annotated training area.
Now for the critical question of why? There are 3 main benefits to multi-class:
- Much simpler and faster workflow — In the past for similar objects/textures, a user would have had to create separate detectors for each one, create new training areas, etc. A common issue that users had in the past was that they would be annotating two similar classes, say cars and trucks in two separate detectors. While annotating the car detector the user would see trucks in their imagery but would have to switch out of the car detector, go into the truck detector, search for that truck and annotate it there, which is a painful and slow process if you can imagine doing this for each truck. Now with multi-class, you can put the truck and car in the same detector and annotate them all in the same place, in the same training area. It may seem like a trivial point, but in reality, it has a major impact on a client’s workflow.
- No overlapping detections — This is more an issue for segmentation detectors where classes appear in close proximity. When running multiple separate detectors, each detector has no idea if one potentially ambiguous region has been already detected by another detector or not. They are separate entities, which means you can have two detectors accidentally predicting the same region as belonging to their class. With multi-class, the detector is forced to choose which class that region belongs to so you get only one result per pixel, which results in much cleaner results that require fewer post-processing fix-ups. So how does it choose? This brings us to the third point.
- Better overall performance per class — By training the same model with multiple classes you are forcing the model to learn about more fine differences between the two classes to differentiate between textures and objects that are more visually similar. We’ve been running tests on various customer datasets simulating the performance of multi-class vs having separate individual detectors. The results are quite consistently better for the multi-class detectors. The gains depend a lot on the difficulty of the problem, how similar the classes are, the characteristics of the distinguishing feature between them, etc, but it ranges anywhere between 1% up to 25%. For example, if you have a bunch of similar-looking objects that are different sizes and want to separate them by size, the individual detector approach will oftentimes produce poor results. multi-class solves this issue quite nicely because it forces the model to learn about the differences in size, even if visually the objects just looked like scaled versions of each other.
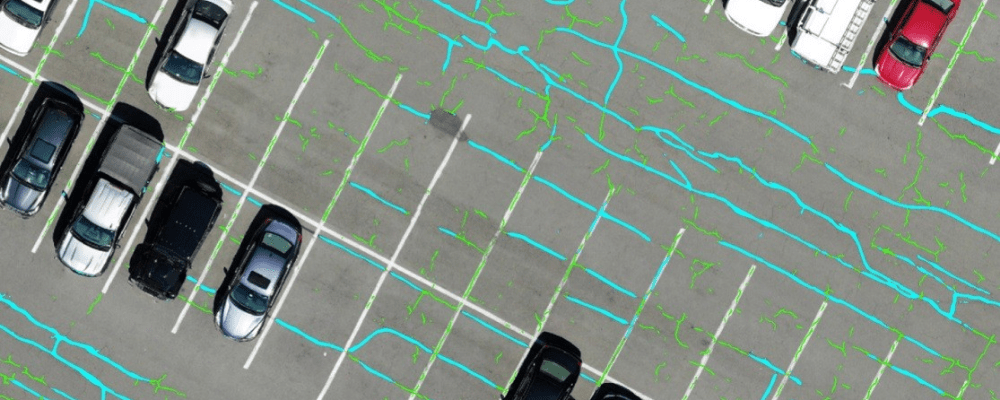
Going back to our pavement example, we can visualize the performance improvement below:
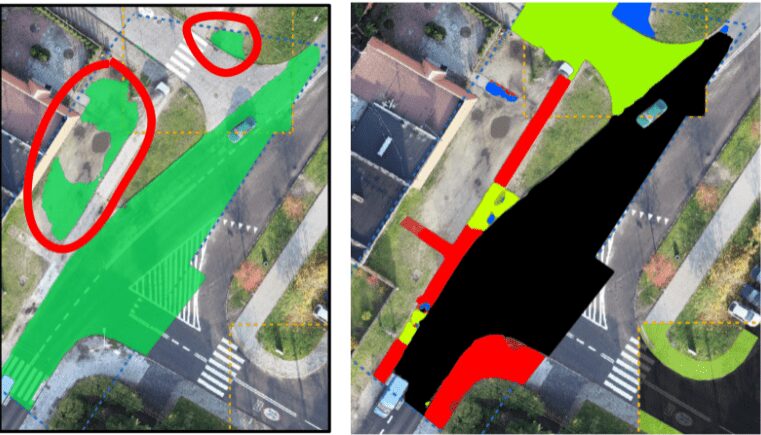
On the left you’ll see the results for the single class asphalt detector in green. Circled in red are problem regions where there was either no pavement of any type or a different pavement type that was misclassified. On the right is the multi-class pavement detector, importing the same annotations for asphalt as used in the single class detector, but now alongside all of the other pavement classes. Here we’ve re-assigned the color of the asphalt results to black. You can see that the dirt is no longer classified as pavement and the other problem region is correctly classified as a different pavement type!
More quantitatively we also measured the difference in performance between the single and multiclass detectors in terms of the area of coverage accuracy metric and saw an average improvement of 5%! Plus remember that now none of the detections overlap, which was a major in the use case with the separate single class detectors approach, near the boundaries of the different pavement types