Having this settings actually solves 3 different problems that we’ve seen users run in to.
- The first is to unify the resolutions of your training images in your detector. Imagine a scenario where you are trying to detector cars and you have 2 different training images in your detector, one at 0.1 meter and one at 0.3 meter resolution. In the 0.3 meter imagery a car will look about 10 pixels long, but that same car in the 0.1 meter imagery will look 30 pixels long. This will just confuse the detector and you will be forced to provide more training annotations to make up for this inconsistency in size. By unifying the resolution to say, for example, 0.2 meters, the cars in all your imagery will be the same size, make it easier for your detector to learn what a car looks like with less annotations.

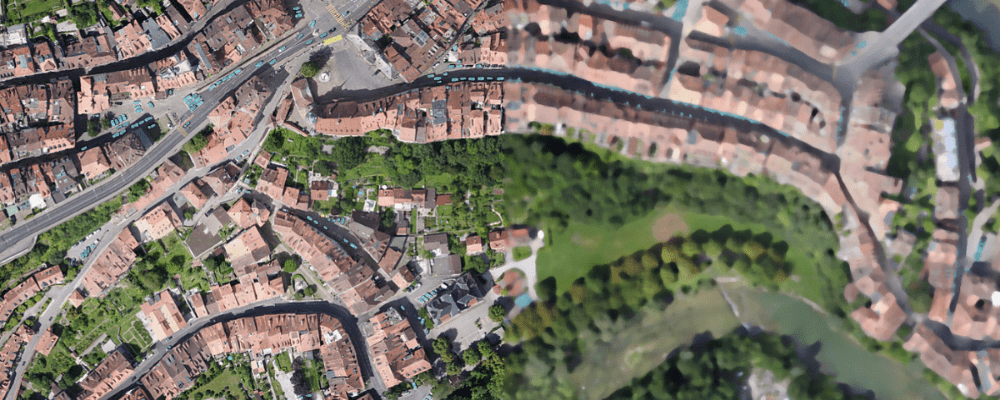
On the left the outline of a car takes up quite a few pixels. In the middle it takes up a lot less. If you feed both of those into the detector training at the same time you will confuse the model as to what size a car actually is. Better to scale both of those images to something more like the image on the right, somewhere in between the two sizes.
- The next benefit requires delving a bit more into the machine learning. When training a detector, due to hardware memory limits, the detector only see a fixed amount of image content at a time. We’ll call this fixed amount a training tile. A training tile could be for example, a 256×256 pixel sample from one of your training areas (which could be any arbitrary size). In order to properly learn what an object looks like there often times needs to be some amount of context or background around the object so that the detector can learn about the relationship between your object of interest and its surroundings. If your resolution of your imagery is super high, your objects are more likely to be larger in terms of number of pixels and may exceed this training tile size, which means your detector will never see an entire house at one time. The solution is simple, if you set a lower target spatial resolution for your detector, your imagery will be automatically scaled down during training, meaning your house will take up fewer pixels and properly fit into these training tiles. Here is a visual example.

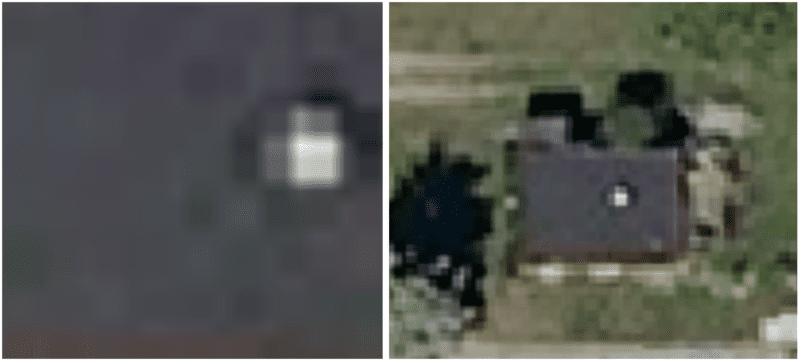
Say a training tile looks like the image on the left. It will be impossible for the model to learn what a house looks like from that. But if you set a lower target resolution then you can downscale your image until it properly fits into the training tile along with some background context (as seen on the right)
- The last benefit is that sometimes the objects or textures you are looking may be too small, say a single pixel large even. Simply due to the nature of deep learning architectures, it’s not easy to detect single pixel objects and it would be better if they were slightly larger. You can therefore increase the spatial resolution setting to scale up your imagery. So if you double the spatial resolution a 1 pixel object becomes a 2×2 pixel object which starts to become a bit more reasonable for your detector to detect. It’s quite rare to have super tiny objects as often that is a sign that the native resolution of your imagery is just too low. More than scaling your images up using this setting, we would first and foremost recommend finding higher resolution imagery to work with in the first place to avoid this issue altogether.Before the release of this setting you could have solved these issues yourself by manually scaling all your images yourself, but imagine a case where you want to rescale your entire training dataset. You would have to scale each image, re-upload them to the platform and re-annotate everything, which is as painful as it sounds. With this setting your can try various different resolution settings just with a few clicks!
The Spatial Resolution detector setting can be accessed here from the detector settings here:
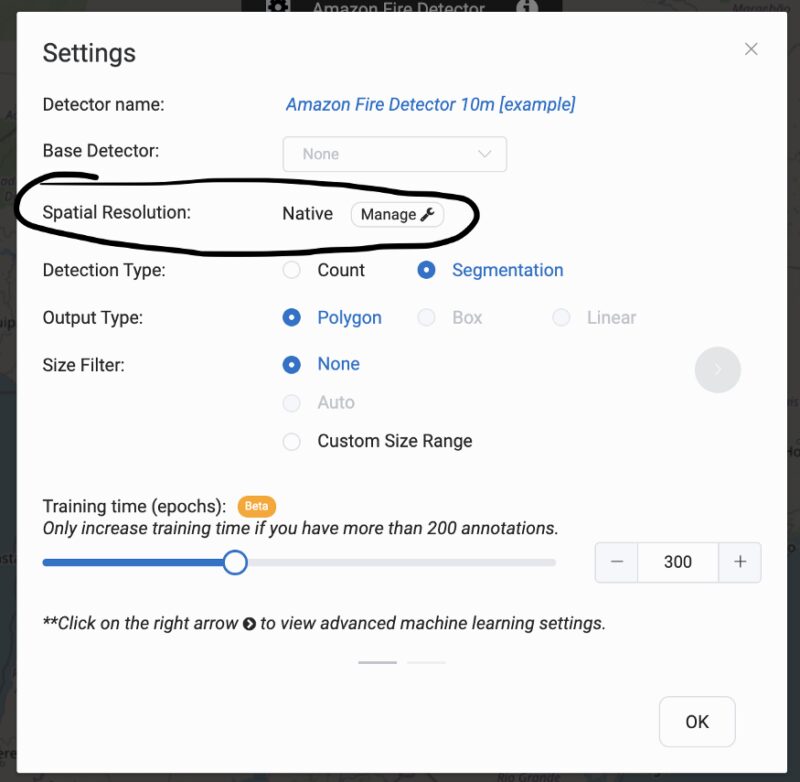
Click the manage button to set the resolution
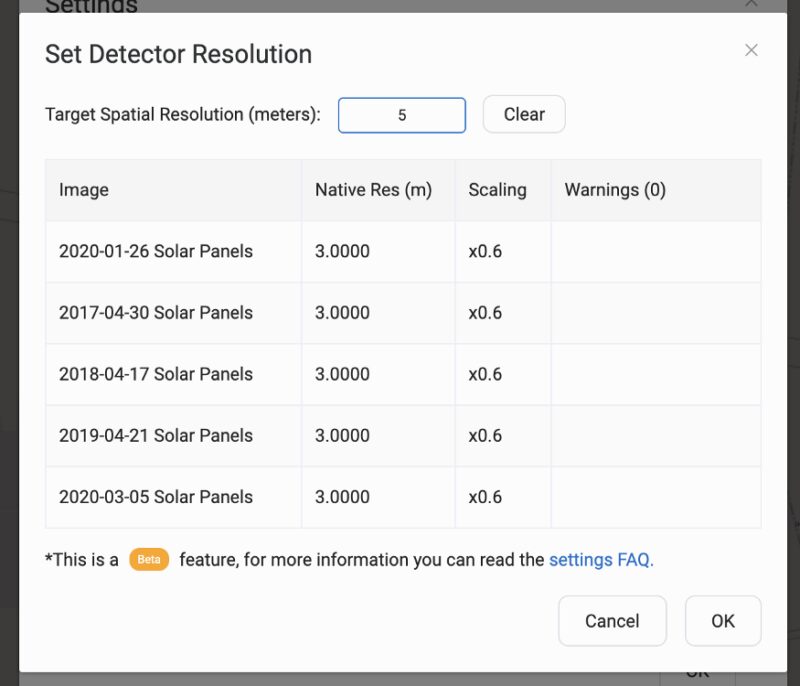
From here you can set the resolution, see what the resulting scaling factor is (how much each image will be scaled by to get to your target spatial resolution), and some warnings which we will explain later. You can also clear the setting to use the native image resolutions with no scaling.