Detecting buildings on Picterra
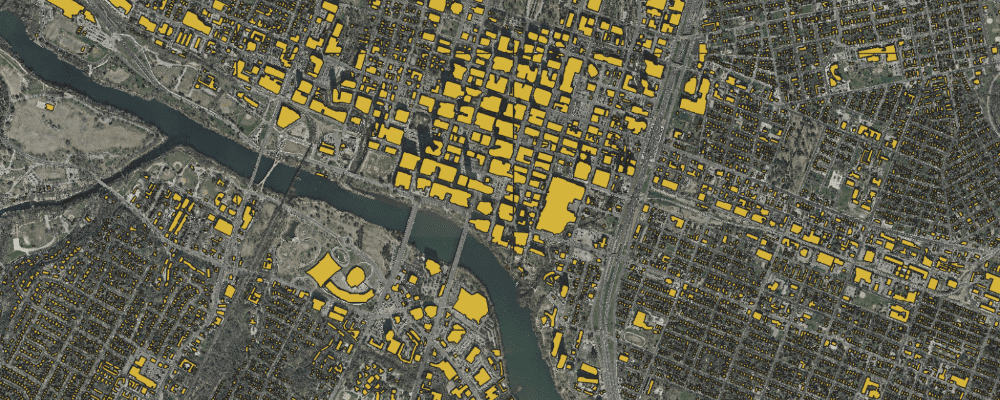
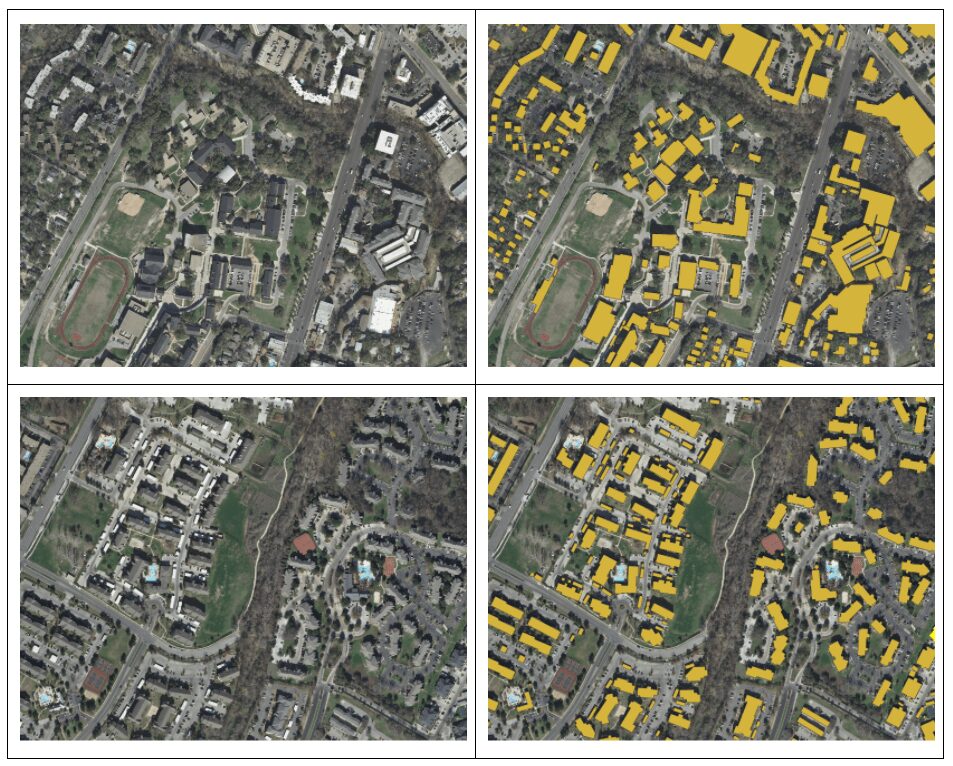
In this example, we built a detector to detect building on the imagery of Austin, TX. The images come from an open dataset and cover an area of 68km² at a resolution of 30cm.
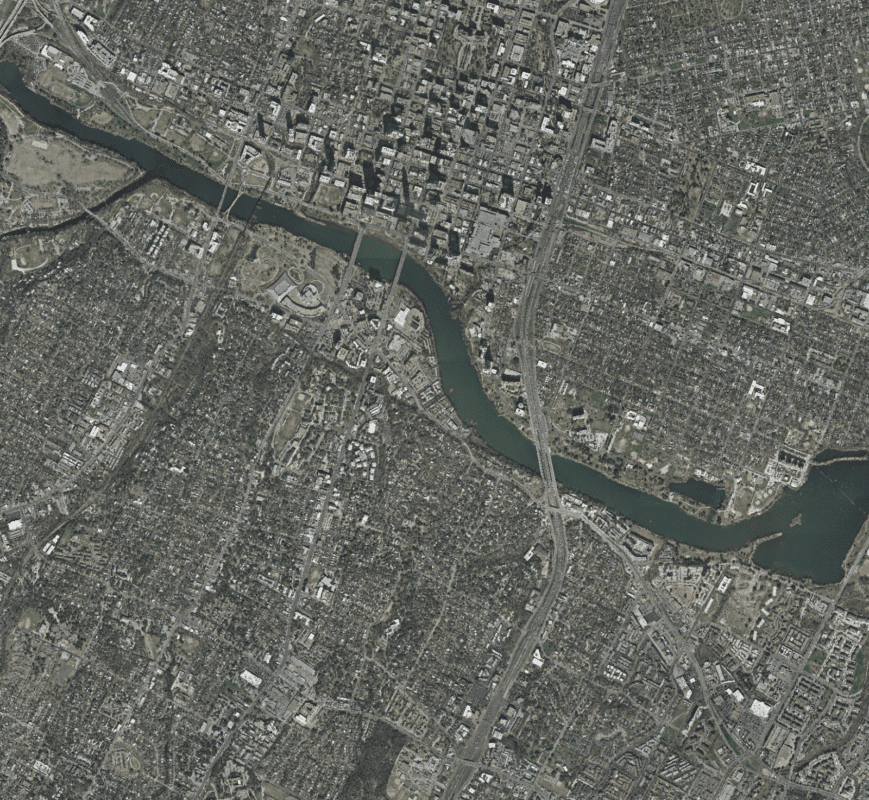
The city of Austin on which we want to detect buildings
Training a detector
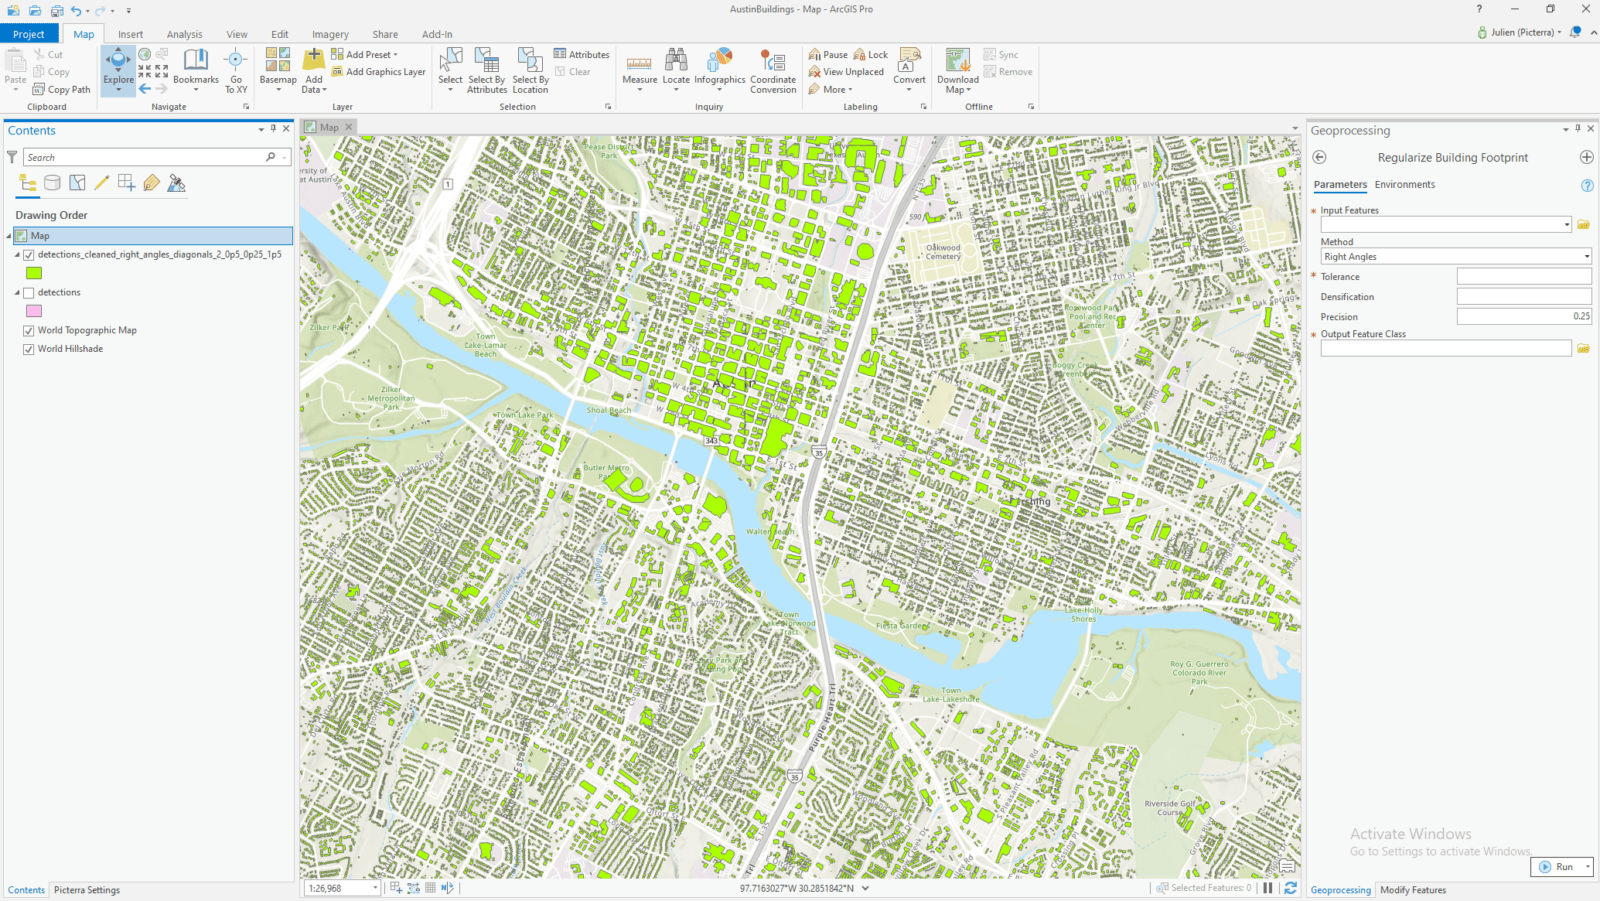
The first step is to train a detector. If you have access to cadastral data in a geographic format (Shapefile or GeoJSON), you can easily import this into the training workspace:

Training a detector on Picterra – using cadastral data as ground truth
The time it takes to train your detector varies quite a bit depending on the size of your dataset and the number of steps. You can train a small one in 10 minutes, but if you have many thousands of annotations and want to train a really good one, it can take between 1 and 4 hours.
Once the detector is trained, it can be run with the click of a button. You have to wait a little bit (around 30 minutes in this case) and then you get your results that you can then export in Shapefile format.
Regularizing detections with ArcGIS Pro
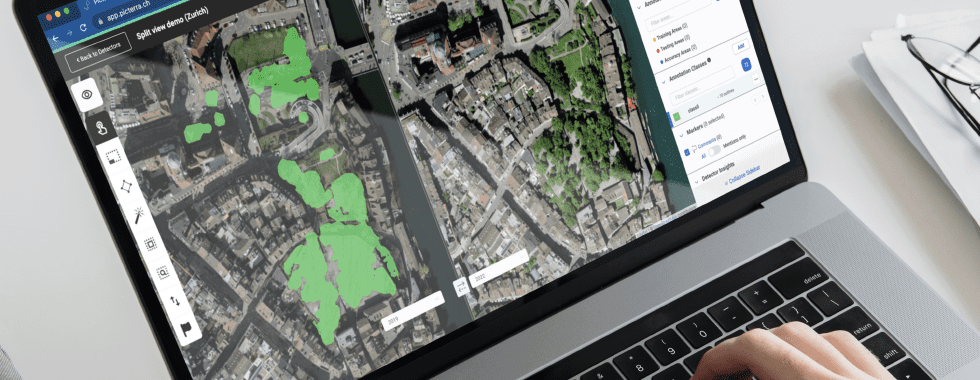
Once you have your results in Shapefile format from Picterra, you can import them in ArcGIS Pro.
Detections in ArcGIS Pro
From there, you need to use the “Regularize Building Footprint” toolbox of ArcGIS. You should refer to their documentation to set the right parameters for your use case.
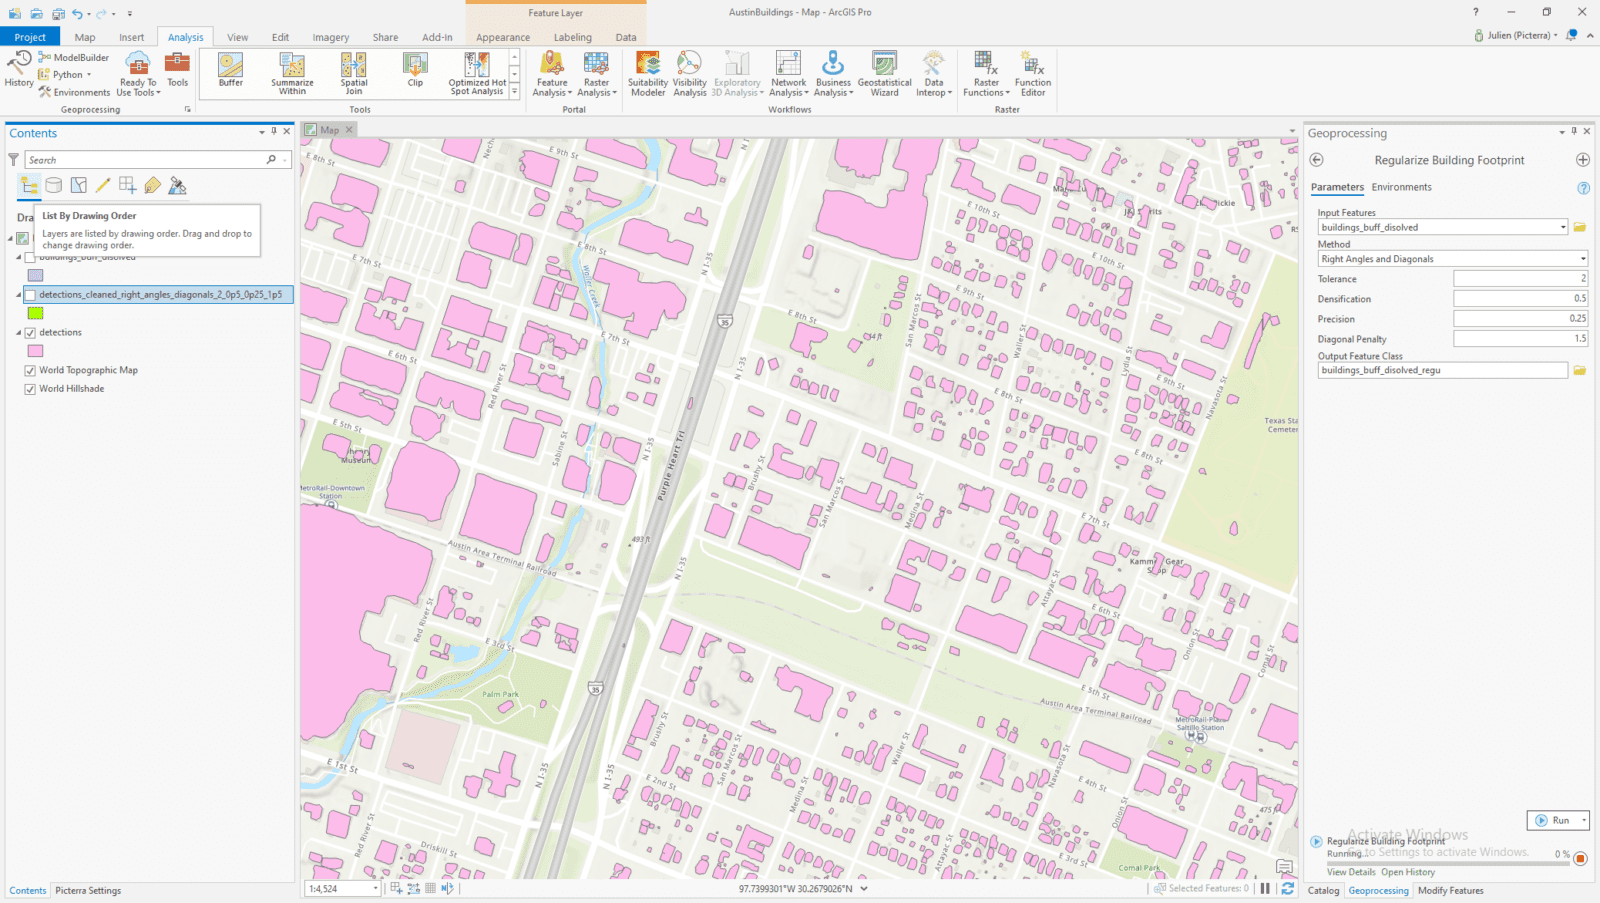
Detections before regularization
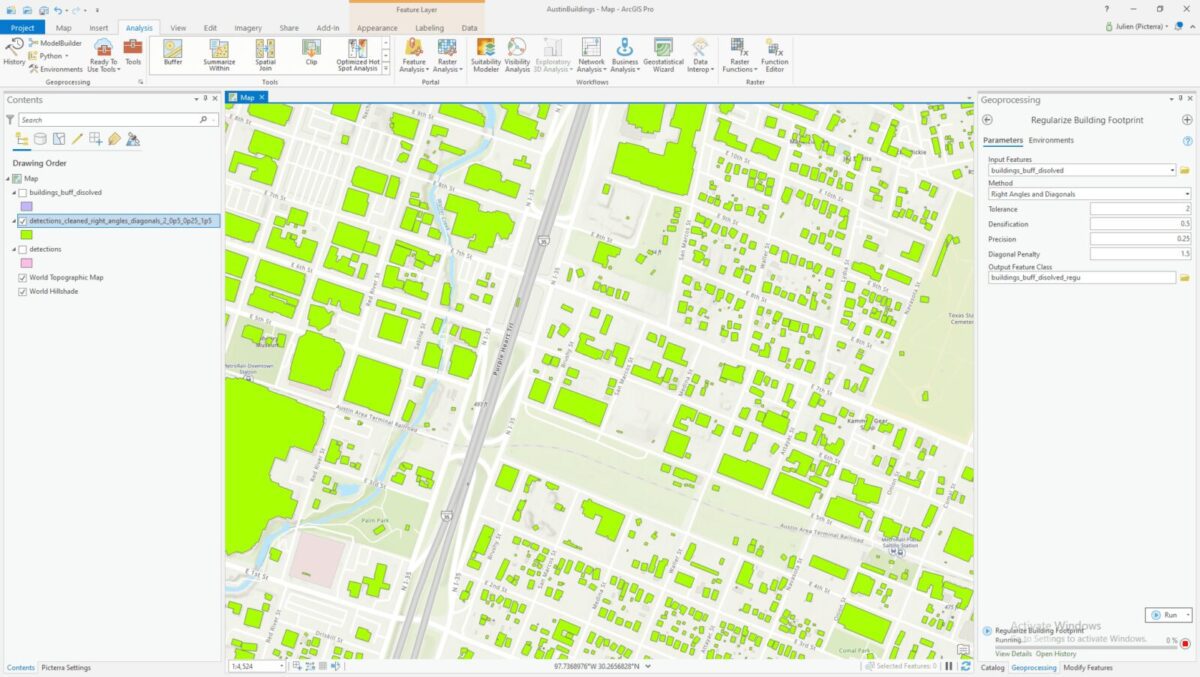
Detections after regularization
Appreciate the results of building mapping!
And that’s it! Combining Picterra and ArcGIS, we now have much better-looking buildings.
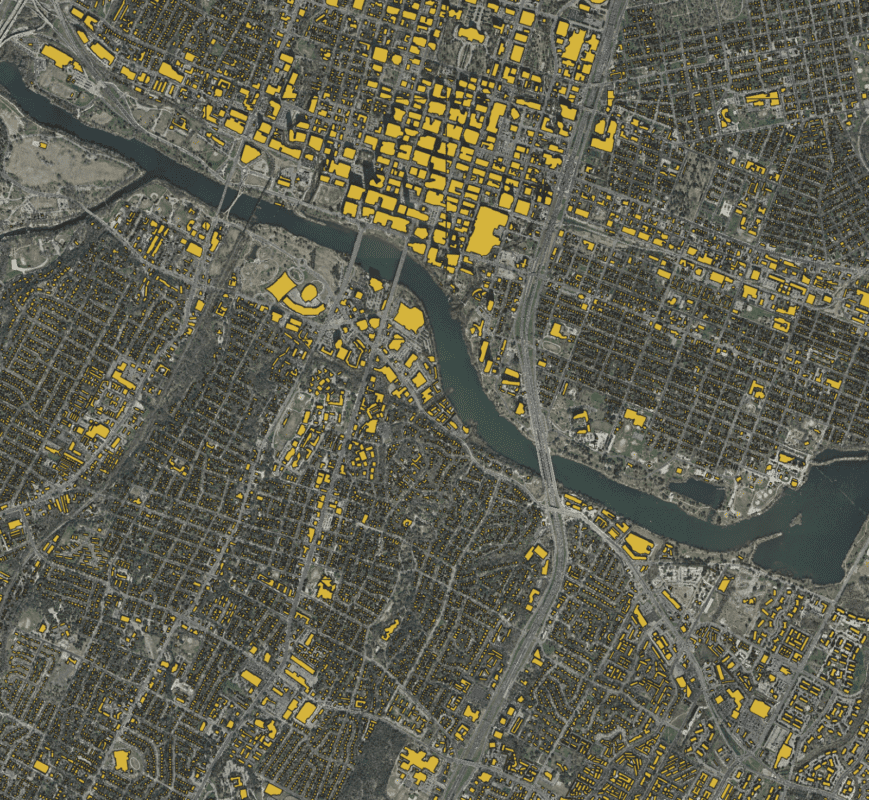
Buildings detected on Austin